Hello guys, This is our first tutorial on our newly created blog. On this we want to share our coding knowledge with you guys. Our dream is to create a place for coding developers where they can find simple and easy coding solutions. From today we would be start learning Flutter. Flutter is a open source UI software development kit. Flutter is created by Google. Basically Flutter is a cross platform software solution for most of the available platforms. But our main goal is to learn mobile application development using Flutter. We can make iOS & Android applications using Flutter. It is a Dart language based framework. So in this article we would discuss about How to setup & install flutter in windows system tutorial.
How to Setup & Install Flutter in Windows System Tutorial
1. Downloading & Installing Flutter Dark SDK package:
1. Go to Flutter SDK Archives page. Download the latest stable Flutter SDK package under windows Tab.
2. Extract the downloaded SDK package in your computer. I'm extracting the SDK in my D Drive. After Extracting the package it looks like below screenshot.
2. Download & Install Android Studio for windows:
1. Go to Android Studio official download page. Click on the Download button and download the latest version of Android studio. At present time there are Android Studio Flamingo is it's latest version.
2. After downloading Android Studio follow all the installation steps and install the latest android SDK manager with its latest options.
3. Setup Android SDK Manager path in Windows:
1. Right Click on This PC(My Computer) and click on Properties.
2. Click on Advanced System Settings.
3. Click on Advanced -> Environment Variables.
4. Under System Variables Click on New.
5. Put Variable name as ANDROID_SDK and Variable value will be your Android SDK Manager Path. I'm adding my PATH to show how it looks like.
4. Setup JAVA_HOME Path in Windows:
1. In our next step we would setup the JAVA_HOME variable with JAVA path.
2. After adding ANDROID_HOME you have to click on New button again and Set Variable Name as JAVA_HOME and Variable value as your Android Studio installation JBR folder location which consist already preinstall JAVA.
5. Setup Flutter SDK Bin folder Path in User Variables:
1. Again open Environment variables. Click on Path under user variables then click on Edit.
2. Click on New then Enter you flutter SDK bin folder Path. I'm filling mine to show you as example.
6. Installing Dart & Flutter plugin in Android Studio:
1. Start Android Studio and Click on Plugins. Then Search for Flutter.
2. It will show you a third party plugin privacy note. Accept it.
3. Then it will ask you to install Dart as required plugin. Again accept it.
4. Click on Restart IDE button.
7. Creating our First Flutter project in Android Studio:
1. Start Android Studio and click on New flutter project.
2. Select Flutter from left side menus then It will ask you to enter your Flutter SDK location so select it. Then click on Next button.
3. Fill all the details like project name and location and Hit Create button. One more thing your project name should be in Small Caps only.
4. Now our Flutter project will be opened in Android Studio. Here is main.dart file is our main project file, In which we would write our code. The main.dart file is present under lib folder. See below screenshot for more details.7. Run my first flutter project in Android Emulator:
1. Click on Tools -> Device Manager in Android Studio.
2. Click on Create New Virtual Device.
3. Select any device as per your requirement and click on Next.
4. Choose the Android Version you like, Maybe it will ask you to download the Android Version. So download it then click on the Next button.
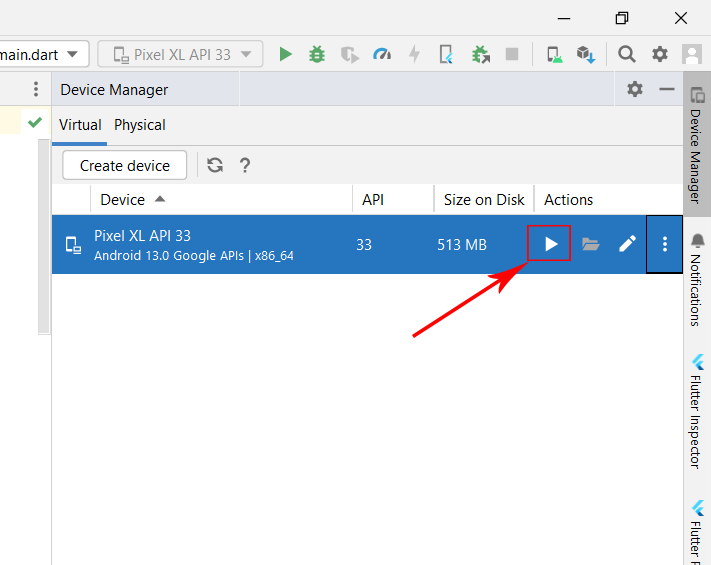
5. Give the AVD name on the next screen and hit the finish button.6. After creating the AVD, It will appear on your right side of Studio screen. Just hit the Play button to start the AVD.7. After a couple of minutest you will see your Android Simulator is started on your screen at the right side.
8. Click on Play Button to run the flutter app in android emulator.
9. With for few minutes, It will start building the app and run the app in simulator.
Search around for few more options in Android Studio. Hope you liked my tutorial. Please comment if you need to ask more about this tutorial.


Comments
Post a Comment